
Dress shirts are a wardrobe essential, but they are also quite fragile. An accidental ink swipe, a yellowed collar after a long summer, or a popped button can cause a favorite shirt to be retired to the back of the closet. Don’t throw them away yet! With a few simple tricks and common kitchen tools, you can restore your shirt to its pristine condition.
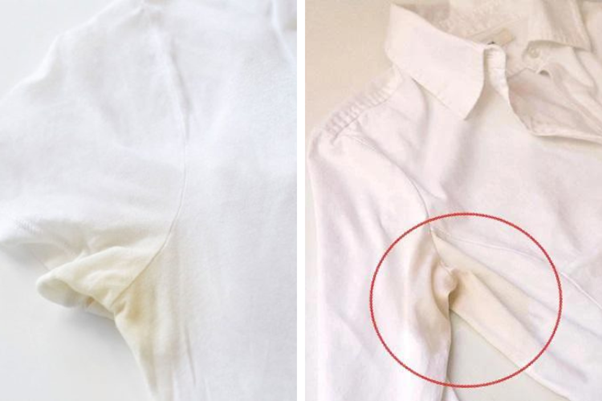
Part 1: “Whitening” yellowed collars and underarms
This is the most common “chronic illness” for white or light-colored shirts, caused by the long-term accumulation of sweat and deodorant. Regular machine washing often fails to clean this.
The cause: Oily sweat combines with dirt and the aluminum salts found in deodorants, creating a stubborn bond with the fabric fibers.
The solution:
- Skip the chlorine bleach (Javel), which can weaken the fabric. Instead, use this formula:
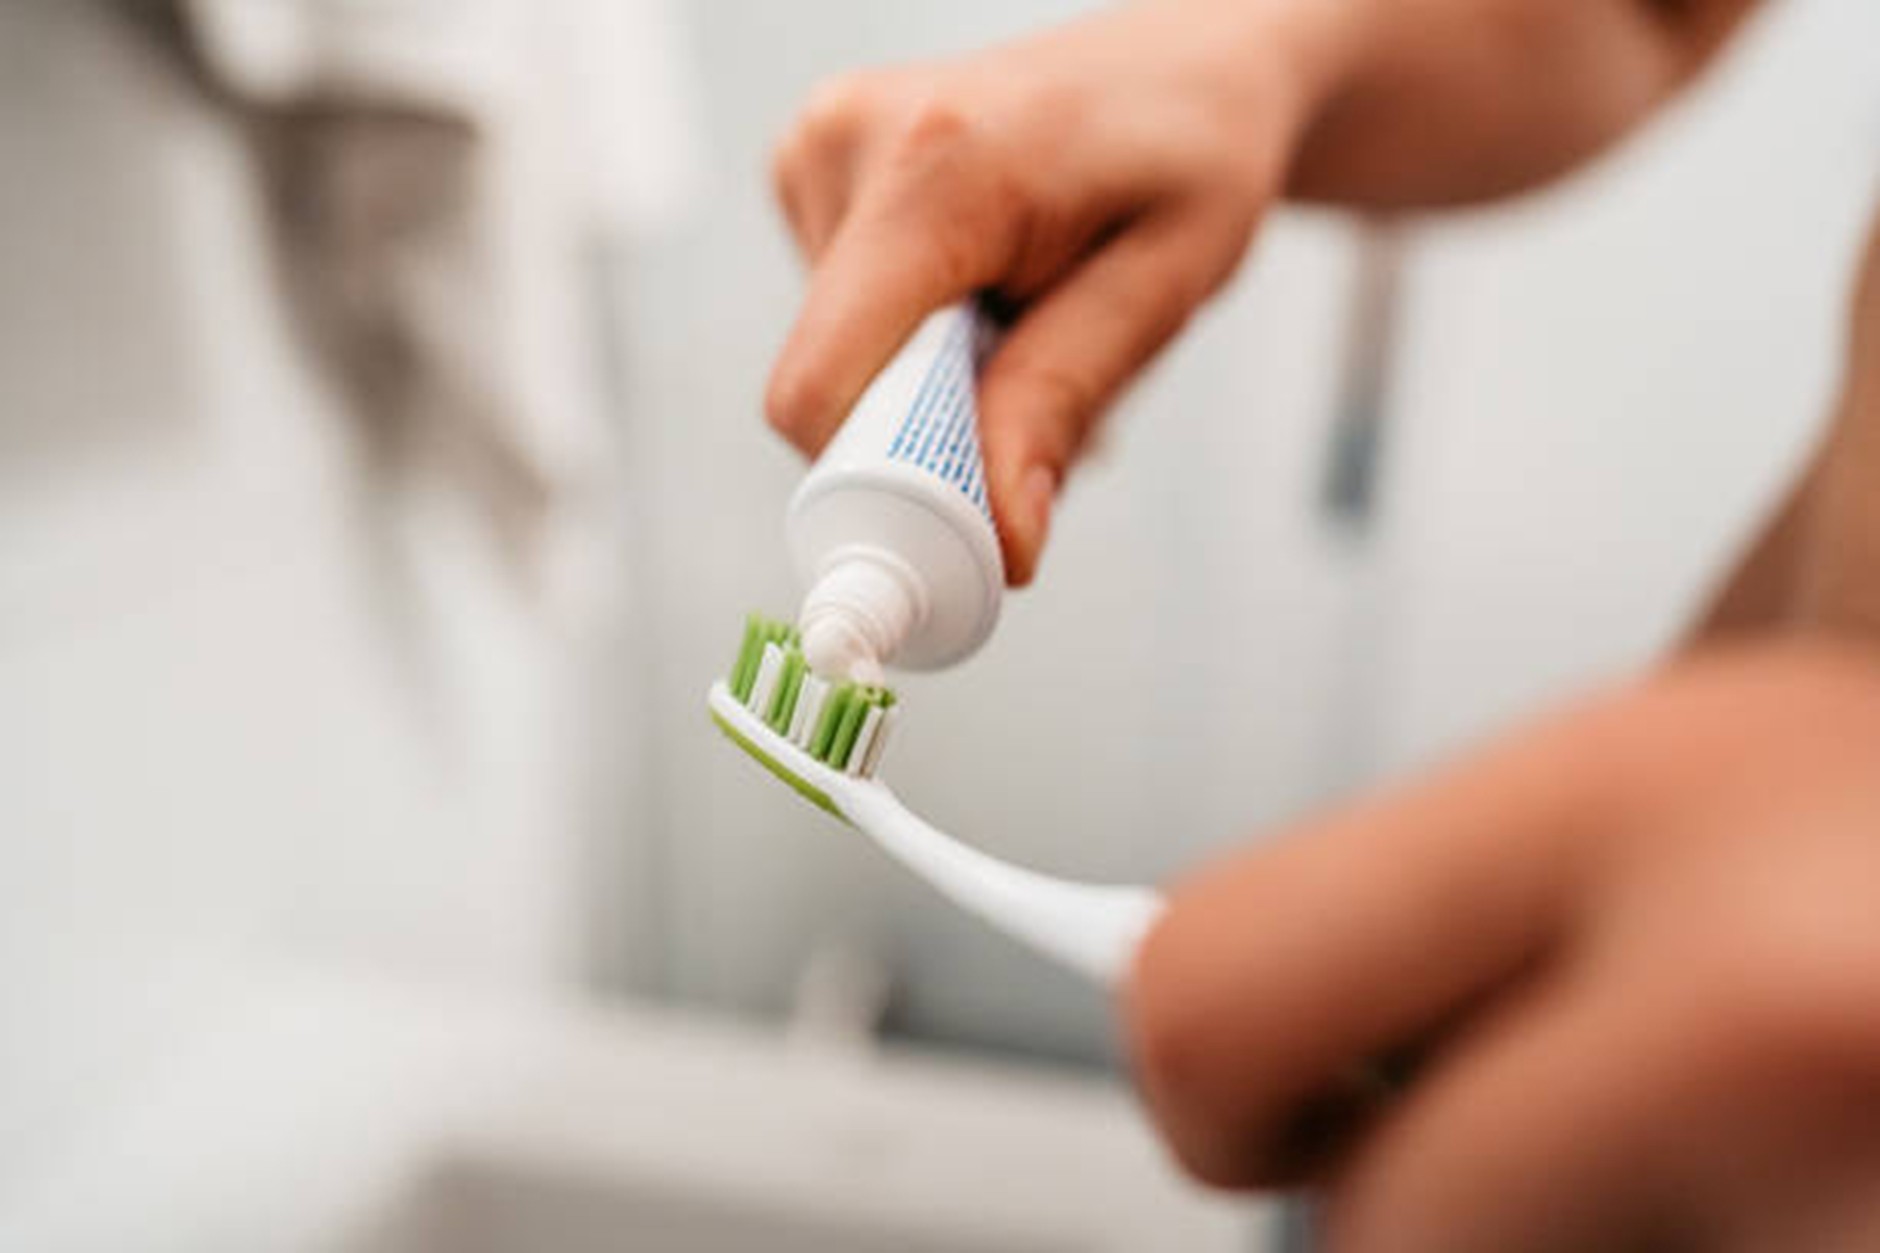
- Ingredients: Baking Soda, White Vinegar (or Lemon), Dish Soap.
Instructions:
- Mix 1 tbsp baking soda + 1 tbsp dish soap + 1 tbsp vinegar (the mixture will fizz).
- Apply the paste directly to the stained collar or underarm area.
- Let it sit for 15-20 minutes to penetrate the fibers.
- Gently scrub with an old toothbrush.
- Wash as normal with warm water.
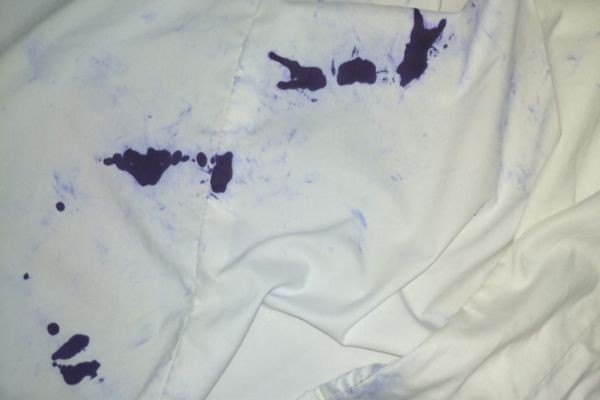
Part 2: Handling “accidental” stains (Ink, coffee…)
Office workers often face the nightmare of a ballpoint pen marking a pocket or a coffee spill. If not treated immediately, these stains can become permanent.
How to fix it:
- For ballpoint ink stains:
- Rubbing alcohol (90%) or hand sanitizer: Soak a cotton pad with alcohol and gently dab (blot) the stain. Never rub hard, as this spreads the ink. The alcohol dissolves the ink, allowing you to lift it off onto the clean cotton.
- Hairspray: Spray directly onto the ink stain, wait for it to dry slightly, then wash clean.
- For coffee/tea stains:
- Egg yolk (folk remedy): Beat an egg yolk, apply it to the stain, let it dry, and then wash it off.
- Diluted vinegar: Soak the stained area in a solution of warm water and vinegar.
Part 3: Loose or missing buttons
A high-end shirt can look cheap instantly if the buttons are loose or dangling by a thread. This is a basic survival skill everyone should know.
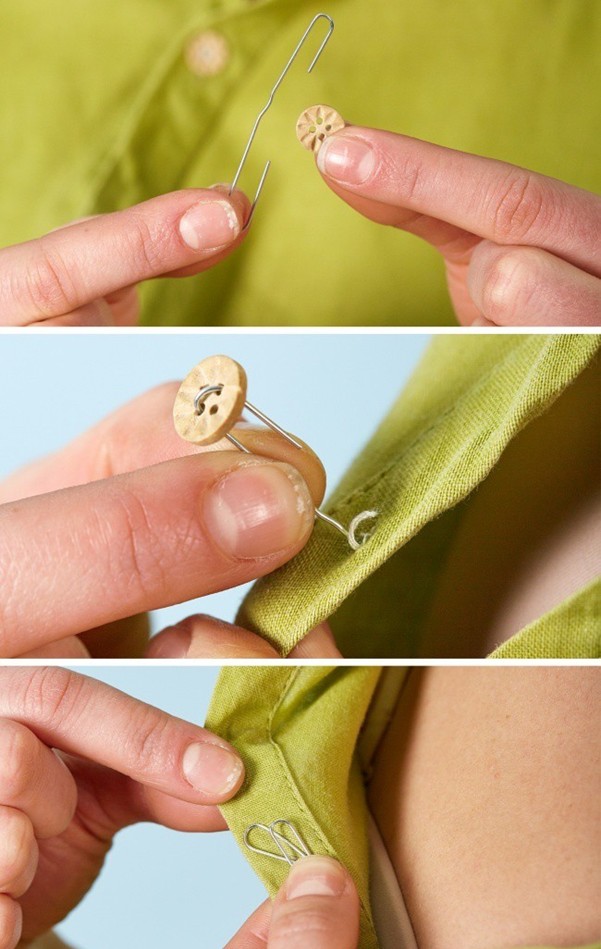
“Tailor-standard” sewing technique:
Preparation: Needle, thread (matching the shirt color), scissors, spare button (usually attached to the inner side tag).
The process:
- Create a “shank” (crucial): When sewing, do not pull the button tight against the fabric. Place a toothpick between the button and the fabric to create space.
- Stitch: Pass the needle up and down through the holes (in an X shape or parallel lines, depending on the other buttons). Repeat 4-5 times.
- Wrap the thread: Remove the toothpick. Wind the thread around the “shank” (the threads between the button and the fabric) 3-4 times. This creates durability and makes the button easier to button up.
- Knot: Push the needle through to the back of the fabric and tie a knot.
Part 4: Frayed collars and cuffs
After long-term use, the edges of collars and cuffs are the first places to fray and show loose threads due to friction.
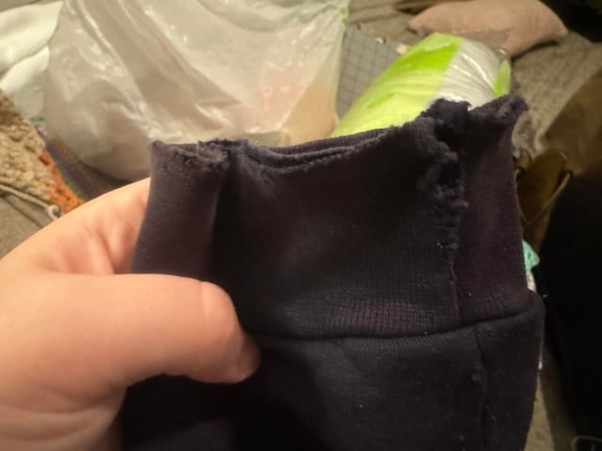
The solutions:
- The simple fix (temporary emergency):
- Use small, sharp scissors (like eyebrow scissors) to neatly trim the frayed threads.
- Apply a tiny amount of clear nail polish or fabric glue to the trimmed edge to stop the fabric from unravelling further.
- The permanent fix (“turning the collar”):
- If you are handy or have a sewing machine: Detach the collar leaf from the collar stand.
- Flip the collar over (the underside is usually brand new and unworn).
- Sew it back onto the shirt. The shirt will look 99% new. If you can’t do this yourself, take it to a tailor and ask them to “turn the collar”, it is usually very affordable.
“Longevity comes from care.” Maintaining and repairing small issues not only saves you a significant amount of money but also preserves those “lucky” shirts you love. Hopefully, this handbook keeps your wardrobe ready and looking sharp!